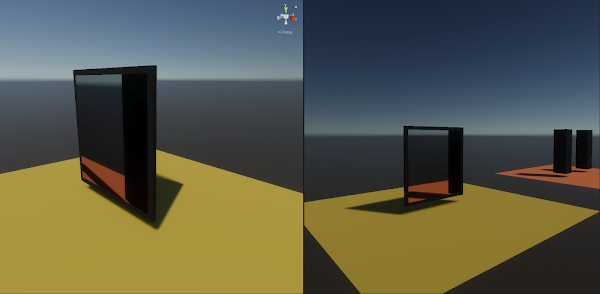
A way to fade out opaque objects
Fading out objects in a real-time 3D engine is among those things that seem way easier than they are. Fadeable objects need a transparent shader which requires additional work to render properly and can make generally less use of optimization techniques. Using transparent shaders to fade out objects means the comparably few frames that an object should look transparent negatively impact its rendering speed and quality even when it should look opaque. Methods working around this (swapping materials or entire objects, Alpha Hashing, ...) all have their pros and cons. In this post I want to present a method that neither solves this problem once and for all, but rather is another tool to consider under the right circumstances. The general idea is the following:
- Render the frame without the objects to fade (henceforth called "custom objects") into buffer A
- Render custom objects with their usual opaque materials into buffer B
- Render custom objects a second time into buffer B with an unlit transparent material that samples the background behind the objects from buffer A (henceforth called "background material")
- Compose buffer B over buffer A
Because the background material has an alpha value, we lay an arbitrary fraction of the background behind an object over the object. That sounds other-worldly, hm? That alpha is reversed, though: the higher the alpha of the background overlay, the more the background shines through, thus the less object you see.*
Although this idea can be implemented in many game engines this post will use Unity's High Definition Render Pipeline (HDRP). It ships with a Custom Pass named Draw Renderers which allows to delay the rendering of specific objects until the background behind them has already been drawn.** We don't have to bother with composing the two buffers A and B because we will make use of the way Unity updates Screen Color textures. In Unity's Shader Graph, the Screen Color node samples the current frame buffer, which I denoted buffer A in step 1 above. Unity doesn't immediately add objects drawn via a Custom Pass to it, which is the key mechanism of this method. Instead, the background behind them is sampled. The setup produces the following draw order:
- Regular opaque objects
- --- Background texture updates ---
- Custom opaque objects
- Custom transparent objects
- Background overdraw for all custom objects
- Regular transparent objects


Layers are used to decide which objects are drawn with a Custom Pass. In your camera settings, you have to disable this layer, so that objects on it are not drawn normally and with a Custom Pass. Dynamically setting objects to this layer is what doesn't make this method "just work". Before your animation starts the fade you have to call a function that sets the layer of the target object and all its children and reverse it once the animation is finished. However, it is a good idea to disable the Renderer or object of a faded-out object anyway, and for that, you have to call a function nonetheless. Always leaving objects on the fade layer is bad from a performance standpoint, because it causes the scene behind objects to be rendered even when the fading isn't needed.
void SetLayerIncludingChildren(Transform root, int newLayer)
{
    var stack = new Stack<Transform>();
    stack.Push(root);

    while (stack.Count > 0)
    {
        var t = stack.Pop();
        t.gameObject.layer = newLayer;

        foreach (Transform child in t)
            stack.Push(child);
    }
}
Opaque and transparent objects need a separate Draw Renderers pass. This is mostly because we want opaque objects to write to the depth buffer, but not transparent ones. However, writing depth becomes a problem when an opaque object is almost faded out because it continues to claim space without filling it anymore. As long as its Renderer isn't disabled, it hides objects behind it, even though you can see through it. This is a general problem of fading out objects that write to the depth buffer. The good news is that with this method, they can only cut off objects that are drawn at the same or a later render pass, which includes other custom opaque and all transparent objects, but never regular opaque ones. If this is still a problem in your scene, you can experiment with not letting custom opaque objects write depth. Then you will see depth sorting artifacts at the fade start, but not at the end.

A similar cutoff happens among different custom objects. Because objects drawn at the same injection point aren't yet included in the Scene Color texture, the background material overdraws them when faded in. So when a custom object fades out, it cuts off all other custom objects behind and even custom transparent objects in front. Custom opaque objects in front are spared because their depth write keeps objects from being drawn behind them altogether.
We can keep custom transparent objects from cutting off opaque ones by distributing both Draw Renderers passes onto their own Custom Pass Component, with an individual background overdraw pass for each. This split causes transparent objects to be injected into a later render state, allowing their background material to sample custom opaque objects. The draw order of the advanced setup is:
- Regular opaque objects
- --- Background texture updates ---
- Custom opaque objects
- Opaque background overdraw
- --- Background texture updates ---
- Regular transparent objects
- Custom transparent objects
- Transparent background overdraw

But even this setup can't solve that drawing custom transparent objects separately from regular ones breaks depth sorting among them. With the advanced setup, you can't render regular transparent objects in front of custom ones. With the simpler one, it's the other way around. If the limitations with transparent objects cause you trouble, you can opt for a hybrid approach. Use this method only for opaque objects and fade transparent objects by animating their alpha value. If they use the HDRP Lit shader, remember to dynamically set its _EnableBlendModePreserveSpecularLighting property, or else specular reflections are still visible on a completely faded object.


Because we don't execute the Depth Pre-Pass of custom opaque objects, but only their Forward pass, they are not considered by Post Process effects sampling the depth buffer, such as Screen Space Ambient Occlusion (SSAO). Yet another Custom Pass Component would fix that when executed After Opaque Depth And Normal, with one Draw Renderers pass drawing the Depth Pre-Pass, but it would also keep the background behind the objects from being drawn. We would blend with black pixels. So, unfortunately, there seems no way of making SSAO work with custom objects. Luckily, it's hard to notice the occlusion disappearing when the object switches layers because your attention will be on the fade effect immediately following. Had you used transparent shaders for every fadeable object instead of this method, you would have the same problem because transparent objects aren't considered by SSAO either. Interestingly, then you would also have shadows that don't fade out with the object, whereas with this method, custom objects don't seem to be able to throw shadows.
At last, let's talk about how to animate the background material. There is no Renderer Component referencing the material with this shader, so the usual way to animate materials isn't working. Unfortunately, Custom Passes don't expose the material to the animation system either. In my project, I worked with a Timeline extension allowing me to animate materials directly. If you don't want to use it in your project, you can create a script that exposes a float and passes it to the background material's _Alpha property in every frame. You would then animate that exposed float. If you want to have finer control, you can use Material Property Overrides to set this property on individual Renderers. The following script does the job. It is very crude, but I wanted to keep it simple for this article.
using UnityEngine;

[ExecuteAlways]
[RequireComponent(typeof(Renderer))]
public class AlphaOverride : MonoBehaviour
{
    [Range(0,1)] public float value;

    void UpdateProperty()
    {
        var block = new MaterialPropertyBlock();
        block.SetFloat("_Alpha", value);
        SetPropertyBlock(block);
    }

    void SetPropertyBlock(MaterialPropertyBlock block)
    	=> GetComponent<Renderer>().SetPropertyBlock(block);

    void OnValidate() => UpdateProperty();
    void OnDidApplyAnimationProperties() => UpdateProperty();
    void OnDisable() => SetPropertyBlock(null);
}
I hope you now have an idea about the up- and downsides of this method. As said before, it's not right for every scene, but I hope the basic idea is still useful enough to help you someday. I used it in a professional project to fade out one central group of objects with a lot of space around them and lots of material slots on them. Some objects referenced opaque materials, others transparent. It worked like a charm.
~ David
* If you also want to fade out objects that use a double-sided material, you have to make your background material double-sided as well, or else it is unable to overdraw the backside of polygons.
** Adjusting the render queue of shaders (2000 for opaque, 3000 for transparent, etc.) isn't the same. It allows overriding the object order within one pass. Only after this order has been determined are the topmost objects (closest to the camera) drawn.

Comments
Post a Comment